so we popped a couple of frozen pizzas into the oven.
The colors and photos on the boxes seemed to whisper excitement and challenge into my thoughts.
It seemed a shame to throw away such a valuable resource. This is what resulted…
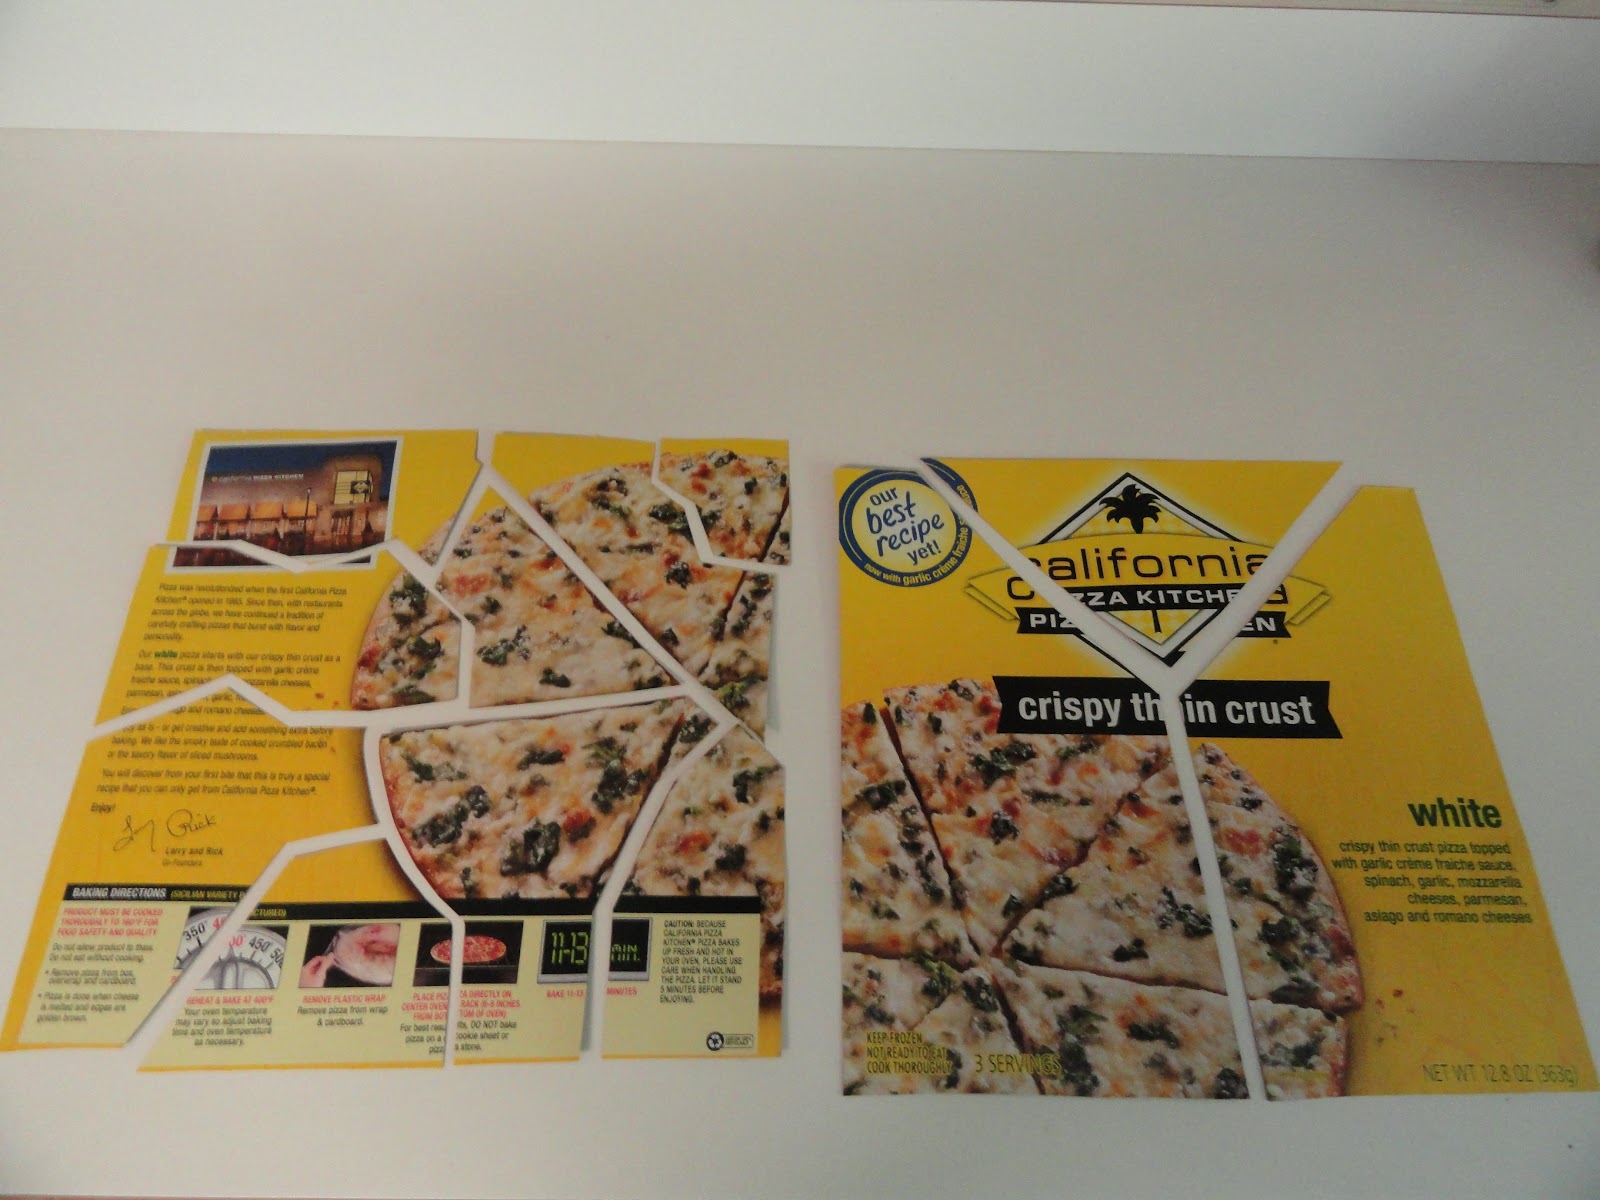
One side of the box became a puzzle for a very young child…several large pieces.
Pieces for the puzzle beginner can be cut in any shape, any way.
You may even want to just cut it straight down the middle for the toddler or young preschool child.

Puzzle Rule of Thumb…a few large pieces for young children and
many smaller pieces for older children and adults.
You may need to start making the pieces larger and fewer again as the person becomes much older, if fighting memory loss and finger flexibility.
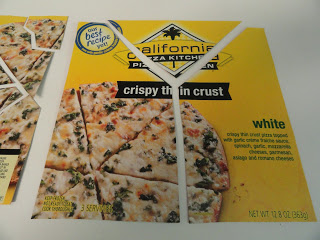
The other side of the box became a fun game of lines and twists
that older children/adults would consider a challenge.
Cut out a variety of many smaller pieces to challenge the puzzle loving adult in the family.
What a great way to keep the brain stimulated for the older family member.

Try to go across pictures so you can match up colors and patterns, as well as shapes.
Another pizza box front required an exploration of the cookie cutters.
Various shapes were chosen to “hide” within the pieces of the puzzle.
It is fun looking for shapes within the pieces. Can you find the gingerbread man?

The final pizza box developed into an inlay puzzle. Both the front and back of the box were cut out into equal size pieces. Cookie cutters were used to trace shapes onto one piece. These shapes were cut out with scissors and stored in a plastic ziploc bag. Don’t worry about cutting across the edges and between shapes. You are going to glue this piece to the solid back piece of chipboard, which will seal those lines back in place. After cutting out your pieces, use a glue stick to glue the front and back together. Now your puzzle has a colorful front and back! Attach the plastic bag filled with the puzzle pieces to the upper corner of the puzzle with a brass brad.


The back of your puzzle, can become another game of “letter search”.
Pick a letter and search the back. You can look for colors, shapes, ingredients, etc.
This would also be good to explore the parts of nutritional labeling.
Compare to labels on other foods.
Pizza boxes are just ONE resource to consider when making puzzles.
Any chipboard food box will work.
The Details
PUZZLE RESOURCES: Besides chipboard food boxes, you can also use the fronts of old greeting cards, calendar pictures or photos. If the calendar picture is too thin, glue it onto a piece of chipboard first (food boxes will work for this) before cutting out your shapes. This could result in a double sided puzzle if you want! What an exciting thought!
PUZZLE STORAGE: You can store the puzzle pieces in a plastic bag or envelope.
Attach with a brass brad to the corner of the puzzle or tape three sides, with the opening at the top, to the back of the puzzle.
Fun boxes, tins, plastic food containers (clear plastic fruit boxes/whipped topping etc.) can also be used to store puzzles.
If you have two pictures the same, it is nice to keep one whole, so you can see the resulting picture. Place it in the bag, envelope or container with the pieces.
LABELING PUZZLES – Always label the container with a description of the resulting picture image, and the number of pieces in that puzzle. If shapes are within the puzzle, list each shape in the description.

Older children like to make their own puzzles. Let them decide how many and what shape pieces. Use the puzzles as a contest.
Set the timer and see who completes their same number of pieces puzzle first.
Switch and start the time again.
VARIATIONS OF PUZZLE FUN
Puzzles are a fun way to leave a message for people or send a greeting in the mail.
It would be a lot more fun to learn of your weekly/daily chore assignment, if you had to put a puzzle together to find out!
Birthday, Holiday, Congratulations or “just because” greetings mailed to, or hidden in various places to be found, would be a lot of fun for your friends, family and loved ones.
Design your message on the computer and print it on cardstock; or use the front of an old greeting card and add your additional message in colorful markers/pens. Cut the message apart into pieces, place in an envelope, seal, address and mail! Then let the fun begin.
Puzzles possess exceptional qualities for ages 2 to 92 years!
BENEFITS OF PUZZLES
1. stimulates mental growth
2. exercises the brain
3. improves and increases memory
4. studies have shown that anxiety is reduced and calmness increases in addition to physiological
positive benefits.
5. increases cognitive skills – colors, shapes, sizes, understanding of the concepts ON the puzzle
6. increases whole-part relationships- understanding that a small unit forms a part of the whole
7. provides experience in visual special awareness
8. improves hand-eye coordination
9. increases motor skills/refines fine motor skills that are needed in eating and writing
10. strengthens the concept of sorting
11.increases confidence upon completion
12.increases concentration skills
13.fosters cooperation/cooperative play and social skills
Plus… its a nice way to pass the time and it is just plain FUN!


